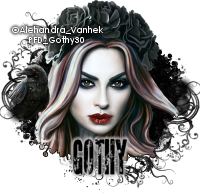
This tutorial was written by me on April 5th, 2011 and is my own creation.
Any resemblance to any other tutorial is purely coincidental and totally unintentional.
PSP Version Used is: PSP 7 And should work in other versions.
Supplies:
Tube of choice.
I am using the awesome artwork of
Keith Garvey, which can be found at
PSPTubesEmporium.
(pte is closed, he can now be found @
Garv-Girls Psp Tubes)
Scrap kit of choice.
I am using the PTU kit
Daisy Mae by
Purple’s Kits.
Mask of choice.
I am using beryl0050. Note: I can not find a site for this designer, so I can not share this mask.
Font of choice.
I am using SF Gothican.
Plugins Used:
3D Effects – Drop Shadow
Eye Candy 4000 – Gradient Glow
Ok, Let’s get started!!
Open your tube, your mask, paper 6, paper 1, and minimize them.
Open paper Paper5, resize it to 400 x 400, minimize it.
Open a new 598 x 447 transparent image.
Selections > Select All.
Copy and Paste paper 1 into selection on your new image. Deselect.
Go to Mask > New > From Image > Find mask in drop down. Using these settings.

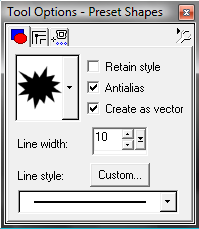
Select preset shapes tool, select “Burst 3” shape, or any if you don’t have it. With these settings.

Set your stroke to pattern using the paper 1 with the settings below.
Make sure your fill is null.

Place this shape above your mask layer. Once it’s how you want it convert it to Raster.
Select paper 5, copy and paste it as a new layer behind your shape layer.
Activate shape layer, select magic wand tool, click inside your shape.
Selections > Modify > Expand > 3. Selections > Invert.
Activate your paper 5 layer, Hit delete. Selections > select none.
Copy and Paste your tube as a new layer. Make sure it’s behind your shape layer.
Once it’s where you want it, activate you shape layer. Select your magic wand tool.
Click inside shape. Selections > Modify > Expand > 3. Selections > Invert.
Activate layer 4. Hit delete. Selections > Select none.
Now go to your layer palette and change the layer blend mode to “Hard Light”.
Hide your mask layer and merge visible the remaining layers.
Unhide your mask layer. Activate your merged layer, apply drop shadow like below.

Now choose elements from scrap you’re using and place them how you like behind your shape layer.
Add the same drop shadow as before as you place your elements.
Copy and paste your tube as new layer, make sure it is the top layer, resize as needed, add drop shadow.
Add new Raster Layer, select your text tool, click your tag. With the stroke null and the fill using the same pattern used on your shape and using settings below.

While text is still selected use Effects > Plug-ins > EyeCandy 4000 > Gradient Glow. With these settings. Color is #800000


Selections > Select none. Layers > New raster layer. Add your name using the same effects, same font, same settings, but make it whatever size you want.
Add new raster layer. Add your copyright and license info and resize as needed!!
You are done!
If you use my tutorials, I would love to see your interpretation, and you’re more then welcome to send them to me at SexyGothAngel@aol.com to ensure that I get them! I'd love to show them off on my blog!!
~*Hugz-N-Bitez*~
Gothy