

This tutorial was written by me on April 16, 2011 and is my own creation.
Any resemblance to any other tutorial is purely coincidental and totally unintentional.
I used psp7 but it should work in other versions as well.
Supplies:
Tube of choice. I am using the awesome artwork of Eos Sparks, which can be found at PspTubesEmporium.
Template of choice. I am using Template41 by Rachel which can be found on her blog HERE in the links section on the right.
Font – (afGiHmtV)*
Plugins Used:
penta
dsb flux
EyeCandy4000
Ok, Let’s get started!!
Open your template, tube, and minimize them.
Restore tube, using your dropper tool select a dark and a light color from your tube.
I used #8A0607 for my light and #6E6D71 as my dark colors.
Minimize tube. Restore template. Delete background and info layers.
Image > Resize > 95% making sure “resize all layers” is checked.
Activate shape layer. Selections > Select All. Selections > Float.
Selections > Modify > Expand > 1. Flood fill selection with your light color.
Selections > Select None. Apply penta – dot and cross with settings below.

Activate Grey Shape layer. Selections > Select All. Selections > Float.
Selections > Modify > Expand > 1. Flood fill selection with your dark color.
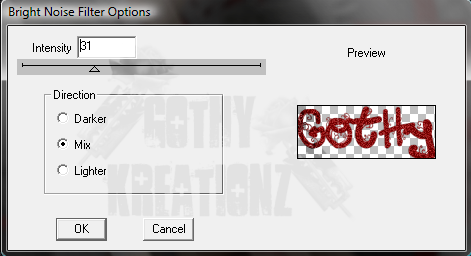
Selections > Select None. Apply DSB Flux – Bright Noise using settings below.

Any resemblance to any other tutorial is purely coincidental and totally unintentional.
I used psp7 but it should work in other versions as well.
Supplies:
Tube of choice. I am using the awesome artwork of Eos Sparks, which can be found at PspTubesEmporium.
Template of choice. I am using Template41 by Rachel which can be found on her blog HERE in the links section on the right.
Font – (afGiHmtV)*
Plugins Used:
penta
dsb flux
EyeCandy4000
Ok, Let’s get started!!
Open your template, tube, and minimize them.
Restore tube, using your dropper tool select a dark and a light color from your tube.
I used #8A0607 for my light and #6E6D71 as my dark colors.
Minimize tube. Restore template. Delete background and info layers.
Image > Resize > 95% making sure “resize all layers” is checked.
Activate shape layer. Selections > Select All. Selections > Float.
Selections > Modify > Expand > 1. Flood fill selection with your light color.
Selections > Select None. Apply penta – dot and cross with settings below.

Activate Grey Shape layer. Selections > Select All. Selections > Float.
Selections > Modify > Expand > 1. Flood fill selection with your dark color.
Selections > Select None. Apply DSB Flux – Bright Noise using settings below.

Hide all layers except Shape and Grey Shape. Layers > Merge > Merge Visible.
Add drop shadow using settings below.

Hide this merged layer. Unhide blackframe1 and 2. Layers > Merge > Merge Visible.
Rename this layer to “SmallFrames”. Unhide all layers.
Make sure small frames layer is still activated.
Selections > Select All. Selections > Float.
Selections > Modify > Expand > 1. Flood fill selection with your light color.
Selections > Select None.
Apply penta – jeans filter using the settings below.

Hide all layers except innerframe 1 and 2. Layers > Merge > Merge Visible.
Rename to “SmallFramesBG”. Unhide all layers.
Restore tube. Copy and paste tube as new layer. Make sure “SmallFrames” layer is above
your tube layer, and “SmallFramesBG” layer is below your tube layer.
Make sure you have your tube layer activated.
Image > Resize > 80% make sure “resize all layers” is not checked.
Place tube under left frame how you like it.
Layers > Duplicate. Image > Mirror. When tubes are where you like
hide all layers except your 2 tube layers. Merge > Merge Visible. Unhide all layers.
Activate SmallFrames layer. Using Magic Wand tool, click inside one frame. While that
is selected hold the shift key and click inside the other frame.
Selections > Modify > Expand > 3. Selections > Invert.
Activate tube layer and hit delete. Selections > Select None.
Change Layer Blend Mode to Luminance and Layer Opacity to 80.
Hide all layers except your tube layer, SmallFrames, and SmallFramesBG.
Merge these layers visible. Add a dropshadow using the same settings as before.
Unhide all layers. Activate LrgeBlackMat layer. Selections > Select All. Selections > Float.
Selections > Modify > Expand > 1. Flood fill this with your dark color. Selections > Select None.
Apply penta – Dot and Cross filter with the same settings as before.
Activate SmlWhiteMat layer. Selections > Select All. Selections > Float.
Selections > Modify > Expand > 1. Flood fill this layer with your light color.
Selections > Select None.
Apply penta – jeans filter with the same settings as before.
Restore your tube, copy and paste as new layer above SmlWhiteMat layer.
When you have your tube where you like, activate your SmlWhiteMat layer again.
Selections > Select All. Selections > Float. Selections > Invert.
Selections > Modify > Contract > 1. Activate tube layer. Hit delete.
Selection > Select None.
Change Layer Blend Mode to Luminance and Layer Opacity to 60%.
Hide all layers except tube layer and SmlWhiteMat layer and merge visible.
Add same dropshadow as before. Unhide LrgeBlackMat layer, merge visible,
and add dropshadow again. Unhide all layers. Restore your tube.
Copy and paste it as your top layer. Place where you like, resize as needed
and add dropshadow using the same settings as below.

Layers > New Raster Layer. Add name using the settings below.

When placed where you want it add dsb flux – bright noise filter using the settings below.

Effects > Plugins > EyeCandy4000 > Gradient Glow using settings below,
and changing first color to black instead of white.


Layers > New Raster Layer. Add copyright and license info, and any word art
you like. Resize as needed.
Save and You are done!
~*Gothy*~
Add drop shadow using settings below.

Hide this merged layer. Unhide blackframe1 and 2. Layers > Merge > Merge Visible.
Rename this layer to “SmallFrames”. Unhide all layers.
Make sure small frames layer is still activated.
Selections > Select All. Selections > Float.
Selections > Modify > Expand > 1. Flood fill selection with your light color.
Selections > Select None.
Apply penta – jeans filter using the settings below.

Hide all layers except innerframe 1 and 2. Layers > Merge > Merge Visible.
Rename to “SmallFramesBG”. Unhide all layers.
Restore tube. Copy and paste tube as new layer. Make sure “SmallFrames” layer is above
your tube layer, and “SmallFramesBG” layer is below your tube layer.
Make sure you have your tube layer activated.
Image > Resize > 80% make sure “resize all layers” is not checked.
Place tube under left frame how you like it.
Layers > Duplicate. Image > Mirror. When tubes are where you like
hide all layers except your 2 tube layers. Merge > Merge Visible. Unhide all layers.
Activate SmallFrames layer. Using Magic Wand tool, click inside one frame. While that
is selected hold the shift key and click inside the other frame.
Selections > Modify > Expand > 3. Selections > Invert.
Activate tube layer and hit delete. Selections > Select None.
Change Layer Blend Mode to Luminance and Layer Opacity to 80.
Hide all layers except your tube layer, SmallFrames, and SmallFramesBG.
Merge these layers visible. Add a dropshadow using the same settings as before.
Unhide all layers. Activate LrgeBlackMat layer. Selections > Select All. Selections > Float.
Selections > Modify > Expand > 1. Flood fill this with your dark color. Selections > Select None.
Apply penta – Dot and Cross filter with the same settings as before.
Activate SmlWhiteMat layer. Selections > Select All. Selections > Float.
Selections > Modify > Expand > 1. Flood fill this layer with your light color.
Selections > Select None.
Apply penta – jeans filter with the same settings as before.
Restore your tube, copy and paste as new layer above SmlWhiteMat layer.
When you have your tube where you like, activate your SmlWhiteMat layer again.
Selections > Select All. Selections > Float. Selections > Invert.
Selections > Modify > Contract > 1. Activate tube layer. Hit delete.
Selection > Select None.
Change Layer Blend Mode to Luminance and Layer Opacity to 60%.
Hide all layers except tube layer and SmlWhiteMat layer and merge visible.
Add same dropshadow as before. Unhide LrgeBlackMat layer, merge visible,
and add dropshadow again. Unhide all layers. Restore your tube.
Copy and paste it as your top layer. Place where you like, resize as needed
and add dropshadow using the same settings as below.

Layers > New Raster Layer. Add name using the settings below.

When placed where you want it add dsb flux – bright noise filter using the settings below.
Effects > Plugins > EyeCandy4000 > Gradient Glow using settings below,
and changing first color to black instead of white.


Layers > New Raster Layer. Add copyright and license info, and any word art
you like. Resize as needed.
Save and You are done!
~*Gothy*~
No comments:
Post a Comment